View as
Sort by
Display
per page

Available for download
Product Number:
51317--9510-SG
ISBN:
9510 2017 CP
Author:
Mona Abdolrazaghi
Publication Date:
2017
$20.00
We're sorry, something went wrong.
We are unable to complete this action. Please try again at a later time.
If this error continues to occur, please contact AMPP Customer Support for assistance.
Error Message:
Please login to use Standards Credits*
* AMPP Members receive Standards Credits in order to redeem eligible Standards and Reports in the Store
You are not a Member.
AMPP Members enjoy many benefits, including Standards Credits which can be used to redeem eligible Standards and Reports in the Store.
You can visit the Membership Page to learn about the benefits of membership.
You have previously purchased this item.
Go to Downloadable Products in your AMPP Store profile to find this item.
You do not have sufficient Standards Credits to claim this item.
Click on 'ADD TO CART' to purchase this item.
Please review your transaction.
Click on 'REDEEM' to use your Standards Credits to claim this item.
You have successfully redeemed:
Go to Downloadable Products in your AMPP Store Profile to find and download this item.

Available for download
Product Number:
AMPP TR21499-2022
Publication Date:
2022
$109.00
We're sorry, something went wrong.
We are unable to complete this action. Please try again at a later time.
If this error continues to occur, please contact AMPP Customer Support for assistance.
Error Message:
Please login to use Standards Credits*
* AMPP Members receive Standards Credits in order to redeem eligible Standards and Reports in the Store
You are not a Member.
AMPP Members enjoy many benefits, including Standards Credits which can be used to redeem eligible Standards and Reports in the Store.
You can visit the Membership Page to learn about the benefits of membership.
You have previously purchased this item.
Go to Downloadable Products in your AMPP Store profile to find this item.
You do not have sufficient Standards Credits to claim this item.
Click on 'ADD TO CART' to purchase this item.
Please review your transaction.
Click on 'REDEEM' to use your Standards Credits to claim this item.
You have successfully redeemed:
Go to Downloadable Products in your AMPP Store Profile to find and download this item.

Available for download
Product Number:
41214-814-SG
Author:
S. G. Croll, C. Siripirom, B. D. Keil
Publication Date:
2014
$20.00
We're sorry, something went wrong.
We are unable to complete this action. Please try again at a later time.
If this error continues to occur, please contact AMPP Customer Support for assistance.
Error Message:
Please login to use Standards Credits*
* AMPP Members receive Standards Credits in order to redeem eligible Standards and Reports in the Store
You are not a Member.
AMPP Members enjoy many benefits, including Standards Credits which can be used to redeem eligible Standards and Reports in the Store.
You can visit the Membership Page to learn about the benefits of membership.
You have previously purchased this item.
Go to Downloadable Products in your AMPP Store profile to find this item.
You do not have sufficient Standards Credits to claim this item.
Click on 'ADD TO CART' to purchase this item.
Please review your transaction.
Click on 'REDEEM' to use your Standards Credits to claim this item.
You have successfully redeemed:
Go to Downloadable Products in your AMPP Store Profile to find and download this item.

Available for download
Product Number:
51219-173-SG
Author:
David Barnes
Publication Date:
2019
$20.00
We're sorry, something went wrong.
We are unable to complete this action. Please try again at a later time.
If this error continues to occur, please contact AMPP Customer Support for assistance.
Error Message:
Please login to use Standards Credits*
* AMPP Members receive Standards Credits in order to redeem eligible Standards and Reports in the Store
You are not a Member.
AMPP Members enjoy many benefits, including Standards Credits which can be used to redeem eligible Standards and Reports in the Store.
You can visit the Membership Page to learn about the benefits of membership.
You have previously purchased this item.
Go to Downloadable Products in your AMPP Store profile to find this item.
You do not have sufficient Standards Credits to claim this item.
Click on 'ADD TO CART' to purchase this item.
Please review your transaction.
Click on 'REDEEM' to use your Standards Credits to claim this item.
You have successfully redeemed:
Go to Downloadable Products in your AMPP Store Profile to find and download this item.

Available for download
Product Number:
41215-886-SG
Author:
Francisco Cortes, Pablo Aragón
Publication Date:
2015
$20.00
We're sorry, something went wrong.
We are unable to complete this action. Please try again at a later time.
If this error continues to occur, please contact AMPP Customer Support for assistance.
Error Message:
Please login to use Standards Credits*
* AMPP Members receive Standards Credits in order to redeem eligible Standards and Reports in the Store
You are not a Member.
AMPP Members enjoy many benefits, including Standards Credits which can be used to redeem eligible Standards and Reports in the Store.
You can visit the Membership Page to learn about the benefits of membership.
You have previously purchased this item.
Go to Downloadable Products in your AMPP Store profile to find this item.
You do not have sufficient Standards Credits to claim this item.
Click on 'ADD TO CART' to purchase this item.
Please review your transaction.
Click on 'REDEEM' to use your Standards Credits to claim this item.
You have successfully redeemed:
Go to Downloadable Products in your AMPP Store Profile to find and download this item.

Available for download
Product Number:
41216-969-SG
Author:
Brad Gooden
Publication Date:
2016
$20.00
We're sorry, something went wrong.
We are unable to complete this action. Please try again at a later time.
If this error continues to occur, please contact AMPP Customer Support for assistance.
Error Message:
Please login to use Standards Credits*
* AMPP Members receive Standards Credits in order to redeem eligible Standards and Reports in the Store
You are not a Member.
AMPP Members enjoy many benefits, including Standards Credits which can be used to redeem eligible Standards and Reports in the Store.
You can visit the Membership Page to learn about the benefits of membership.
You have previously purchased this item.
Go to Downloadable Products in your AMPP Store profile to find this item.
You do not have sufficient Standards Credits to claim this item.
Click on 'ADD TO CART' to purchase this item.
Please review your transaction.
Click on 'REDEEM' to use your Standards Credits to claim this item.
You have successfully redeemed:
Go to Downloadable Products in your AMPP Store Profile to find and download this item.

Available for download
Product Number:
NACE SP0616-2022
Publication Date:
2022
$109.00
We're sorry, something went wrong.
We are unable to complete this action. Please try again at a later time.
If this error continues to occur, please contact AMPP Customer Support for assistance.
Error Message:
Please login to use Standards Credits*
* AMPP Members receive Standards Credits in order to redeem eligible Standards and Reports in the Store
You are not a Member.
AMPP Members enjoy many benefits, including Standards Credits which can be used to redeem eligible Standards and Reports in the Store.
You can visit the Membership Page to learn about the benefits of membership.
You have previously purchased this item.
Go to Downloadable Products in your AMPP Store profile to find this item.
You do not have sufficient Standards Credits to claim this item.
Click on 'ADD TO CART' to purchase this item.
Please review your transaction.
Click on 'REDEEM' to use your Standards Credits to claim this item.
You have successfully redeemed:
Go to Downloadable Products in your AMPP Store Profile to find and download this item.

Available for download
Product Number:
21241-SG
Publication Date:
2002
$179.00
We're sorry, something went wrong.
We are unable to complete this action. Please try again at a later time.
If this error continues to occur, please contact AMPP Customer Support for assistance.
Error Message:
Please login to use Standards Credits*
* AMPP Members receive Standards Credits in order to redeem eligible Standards and Reports in the Store
You are not a Member.
AMPP Members enjoy many benefits, including Standards Credits which can be used to redeem eligible Standards and Reports in the Store.
You can visit the Membership Page to learn about the benefits of membership.
You have previously purchased this item.
Go to Downloadable Products in your AMPP Store profile to find this item.
You do not have sufficient Standards Credits to claim this item.
Click on 'ADD TO CART' to purchase this item.
Please review your transaction.
Click on 'REDEEM' to use your Standards Credits to claim this item.
You have successfully redeemed:
Go to Downloadable Products in your AMPP Store Profile to find and download this item.

Available for download
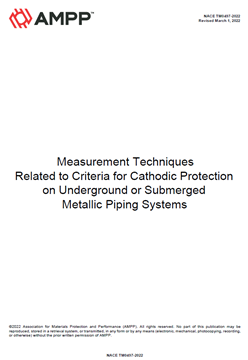
Product Number:
NACE TM0497-2022
Publication Date:
2022
$109.00
We're sorry, something went wrong.
We are unable to complete this action. Please try again at a later time.
If this error continues to occur, please contact AMPP Customer Support for assistance.
Error Message:
Please login to use Standards Credits*
* AMPP Members receive Standards Credits in order to redeem eligible Standards and Reports in the Store
You are not a Member.
AMPP Members enjoy many benefits, including Standards Credits which can be used to redeem eligible Standards and Reports in the Store.
You can visit the Membership Page to learn about the benefits of membership.
You have previously purchased this item.
Go to Downloadable Products in your AMPP Store profile to find this item.
You do not have sufficient Standards Credits to claim this item.
Click on 'ADD TO CART' to purchase this item.
Please review your transaction.
Click on 'REDEEM' to use your Standards Credits to claim this item.
You have successfully redeemed:
Go to Downloadable Products in your AMPP Store Profile to find and download this item.

Available for download
Product Number:
51218-108-SG
Author:
Matt Fajt
Publication Date:
2018
$20.00
We're sorry, something went wrong.
We are unable to complete this action. Please try again at a later time.
If this error continues to occur, please contact AMPP Customer Support for assistance.
Error Message:
Please login to use Standards Credits*
* AMPP Members receive Standards Credits in order to redeem eligible Standards and Reports in the Store
You are not a Member.
AMPP Members enjoy many benefits, including Standards Credits which can be used to redeem eligible Standards and Reports in the Store.
You can visit the Membership Page to learn about the benefits of membership.
You have previously purchased this item.
Go to Downloadable Products in your AMPP Store profile to find this item.
You do not have sufficient Standards Credits to claim this item.
Click on 'ADD TO CART' to purchase this item.
Please review your transaction.
Click on 'REDEEM' to use your Standards Credits to claim this item.
You have successfully redeemed:
Go to Downloadable Products in your AMPP Store Profile to find and download this item.

Available for download
Product Number:
51218-166-SG
Author:
Dr. Rebekah Wilson & Brooke Divan
Publication Date:
2018
$20.00
We're sorry, something went wrong.
We are unable to complete this action. Please try again at a later time.
If this error continues to occur, please contact AMPP Customer Support for assistance.
Error Message:
Please login to use Standards Credits*
* AMPP Members receive Standards Credits in order to redeem eligible Standards and Reports in the Store
You are not a Member.
AMPP Members enjoy many benefits, including Standards Credits which can be used to redeem eligible Standards and Reports in the Store.
You can visit the Membership Page to learn about the benefits of membership.
You have previously purchased this item.
Go to Downloadable Products in your AMPP Store profile to find this item.
You do not have sufficient Standards Credits to claim this item.
Click on 'ADD TO CART' to purchase this item.
Please review your transaction.
Click on 'REDEEM' to use your Standards Credits to claim this item.
You have successfully redeemed:
Go to Downloadable Products in your AMPP Store Profile to find and download this item.

Available for download
Product Number:
41215-878-SG
Author:
David Beamish
Publication Date:
2015
$20.00
We're sorry, something went wrong.
We are unable to complete this action. Please try again at a later time.
If this error continues to occur, please contact AMPP Customer Support for assistance.
Error Message:
Please login to use Standards Credits*
* AMPP Members receive Standards Credits in order to redeem eligible Standards and Reports in the Store
You are not a Member.
AMPP Members enjoy many benefits, including Standards Credits which can be used to redeem eligible Standards and Reports in the Store.
You can visit the Membership Page to learn about the benefits of membership.
You have previously purchased this item.
Go to Downloadable Products in your AMPP Store profile to find this item.
You do not have sufficient Standards Credits to claim this item.
Click on 'ADD TO CART' to purchase this item.
Please review your transaction.
Click on 'REDEEM' to use your Standards Credits to claim this item.
You have successfully redeemed:
Go to Downloadable Products in your AMPP Store Profile to find and download this item.

